Top 10 Tile Shower Membranes for Easy Waterproofing?

A tile shower can look solid while water quietly reaches the framing behind it. The grout may appear clean, yet corners, niches, and curb transitions often remain vulnerable. That is why choosing the right tile shower membrane deserves more attention than selecting another surface pattern.

Industry guidance supports this concern. The Tile Council of North America’s 2024 Handbook emphasizes continuous waterproofing, properly treated joints, and compatible installation systems. ANSI A118.10 also sets performance requirements for load-bearing, bonded waterproof membranes used beneath tile. These documents do not endorse one product. They establish the conditions a reliable system should meet.

Bathroom renovation research from Houzz shows that homeowners continue investing in upgraded showers, including larger formats and specialized storage. Those designs create more seams and penetrations. More details mean more opportunities for installation errors. Small gaps matter.

This guide compares 10 leading membranes for practical shower waterproofing. Each option is considered for material type, installation method, thickness, seam treatment, drain compatibility, and field usability. We also consider how a membrane behaves around a recessed niche, a bench corner, or a sharp curb edge.

No membrane is perfect. Even a highly rated product can fail when substrates move, overlaps are incomplete, or curing instructions are ignored. That uncomfortable point is easy to miss. Product selection helps, but disciplined installation decides the result. The rankings therefore combine manufacturer documentation, industry standards, installer experience, and realistic jobsite limitations. Read the comparisons carefully, because the best choice may depend less on brand popularity and more on your shower’s geometry, schedule, and installer skill.

Top 10 Tile Shower Membranes for Easy Waterproofing?

What a Tile Shower Membrane Does and Why It Matters

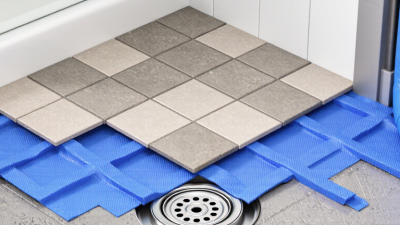
A tile shower membrane is the hidden layer that keeps water away from framing and wall cavities. Tile and grout resist moisture, but neither forms a dependable waterproof barrier. Water can travel through small cracks, loose joints, or porous grout. The membrane redirects that water toward the drain. Without it, damp timber, stained walls, and persistent odors may appear months later.

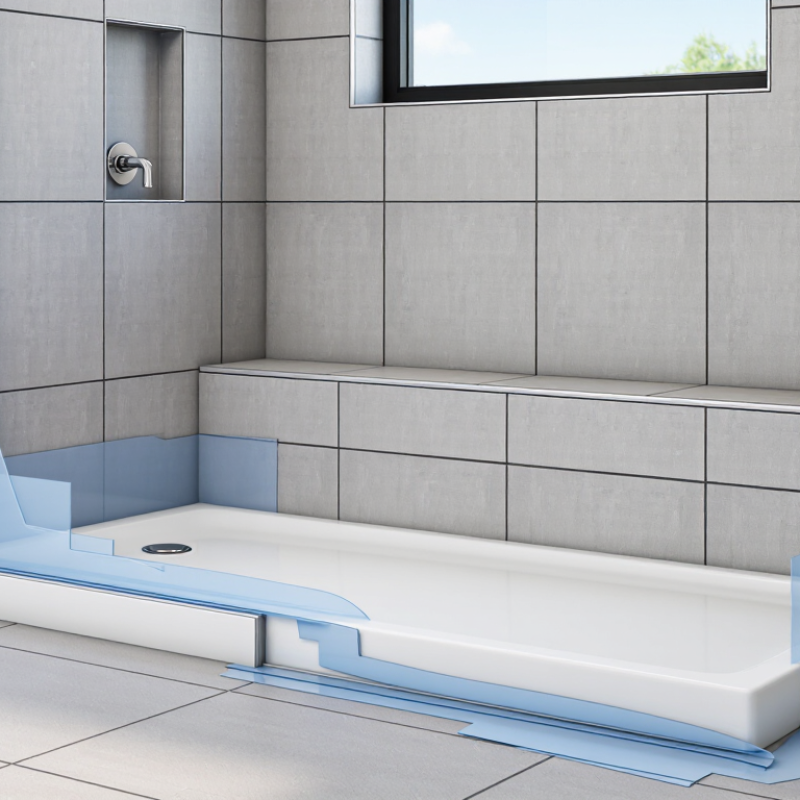
In practical installation, the details matter more than the product label. The membrane should cover the shower floor, walls, corners, and curb continuously. Seams require careful overlap or approved sealing. The drain connection must remain watertight. A small gap near a corner can become a serious leak path. I have seen beautiful tile work fail because the waterproof layer stopped short of the curb.

Different membranes suit different construction methods. Sheet membranes offer consistent thickness, while liquid-applied systems can fit irregular surfaces. Both demand clean preparation and correct curing time. Follow the technical instructions, not memory. A flood test can reveal problems before tile hides them, although testing does not excuse poor detailing. Even experienced installers occasionally rush one penetration or underestimate movement. That is worth questioning. Waterproofing is not decorative work; it is a controlled drainage system beneath the visible shower surface.

How to Compare the Main Types of Shower Membranes

Top 10 Tile Shower Membranes for Easy Waterproofing?

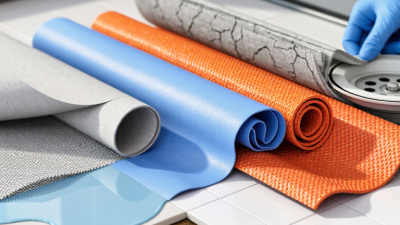
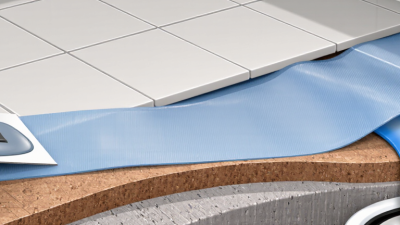
Comparing shower membranes means examining installation risk, not only price. Sheet membranes offer consistent thickness and immediate coverage. Their factory seams reduce guesswork, but corners still require careful folding or sealing. Liquid-applied membranes fit irregular surfaces well. However, coverage depends on wet-film thickness and drying conditions. Foam boards combine waterproofing and insulation, although damaged edges can create weak points.

The 2024 TCNA Handbook emphasizes continuous waterproofing, sealed penetrations, and compatible drainage details. ASTM C836 and ASTM C898 also define performance requirements for liquid-applied materials. These standards are useful references, not shortcuts.

I have seen failures near benches and niches, where installers rushed the transitions. Small gaps matter.

The U.S. Environmental Protection Agency states that WaterSense showerheads use no more than 2.0 gallons per minute, compared with the federal 2.5-gallon limit. Lower flow does not excuse poor membrane detailing; water still collects behind tile.

Tips: Use one complete system whenever possible. Check the manufacturer’s required thickness, cure time, and overlap measurements. A wet-film gauge is inexpensive and exposes thin spots immediately. Photograph every penetration before tiling. That record can reveal problems later.

Do not assume thicker is always better. Excess material may crack, trap moisture, or interfere with the drain connection.

My own preference changes by project: sheets suit predictable layouts, while liquid membranes help around curved surfaces. Neither option is foolproof. The substrate and installer still decide much of the outcome.

Top 10 Tile Shower Membranes for Easy Waterproofing

Top 10 Tile Shower Membranes for Easy Waterproofing

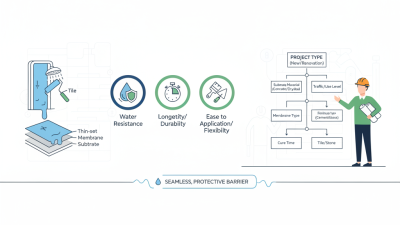
Top 10 tile shower membranes for easy waterproofing should be judged by installation method, not advertising claims. Sheet polyethylene membranes create a continuous barrier with sealed overlaps. Composite sheets add reinforcement around corners and pipe openings. Liquid acrylic membranes brush on easily over prepared surfaces. Cementitious coatings suit masonry and tolerate alkaline substrates. Polyurethane liquids form flexible films but need careful thickness control.

PVC liners remain practical for traditional shower pans. CPE liners offer strong flexibility and resist many common chemicals. Fabric-reinforced liquid membranes help bridge small surface imperfections. Waterproof foam boards combine structure and moisture protection in one panel. Waterproof uncoupling membranes can protect tile assemblies while managing limited movement. Each option has limits. A liner cannot replace proper drainage.

I check the substrate with a straightedge before applying anything. Uneven walls create thin spots and trapped air. Corners receive extra attention. I seal every joint, fastener, niche, and pipe penetration according to the installation instructions. A wet-film gauge helps confirm liquid coverage, although many installers skip it. That is a mistake. I also perform a flood test when the system requires one, then wait for the approved curing period. My own weak point is rushing detail work near the drain. It looks finished early. It is not. Manufacturer instructions and recognized plumbing standards should guide the final assembly, because membrane compatibility changes between systems.

How to Install a Shower Membrane Step by Step

A reliable tile shower starts with the membrane, not the tile. Choose a sheet or liquid membrane approved for wet areas, then inspect the shower base carefully. The surface must be solid, clean, and properly sloped toward the drain. Even a small dip can hold water behind the finished tile.

Measure every wall before cutting. Leave enough material to cover corners and planned overlaps. Apply the membrane according to its instructions, using the correct mortar, adhesive, or primer. Press sheet material firmly with a flat tool. Remove trapped air and wrinkles. For liquid membranes, use a wet-film gauge when required. Two thin coats may work better than one heavy coat. Let each layer dry fully.

Seal corners, joints, pipe openings, and the drain connection with compatible accessories or carefully applied membrane. These details usually decide whether waterproofing succeeds. I once rushed a corner and noticed a slight fold after installation. It looked harmless, but it could have created a weak path for moisture. I removed that section and repaired it before continuing. Do not tile yet. Allow the membrane to cure, then inspect every seam under bright light. A simple water test can reveal leaks, but follow the membrane and drain manufacturer’s testing guidance. Finally, confirm local building requirements before covering the work. A careful pause here is cheaper than removing soaked wall materials later.

Common Installation Mistakes and Long-Term Maintenance Tips

Top 10 Tile Shower Membranes for Easy Waterproofing?

A reliable shower depends on careful membrane installation, not attractive tile alone. In real projects, many failures begin with small oversights. Installers sometimes leave pinholes around corners, cut membrane openings too widely, or forget to seal fasteners. These gaps may remain invisible until moisture reaches the framing. The substrate must be clean, stable, and properly prepared. Dust can weaken bonding. Uneven surfaces can also create hollow areas beneath the membrane.

Tips: Press the membrane firmly into corners without stretching it. Overlap seams according to the system’s instructions. Seal pipe penetrations completely. Protect the drain connection from debris. Before tiling, perform a flood test when the installation method allows it. Mark the water level and check it after 24 hours. This simple step can reveal a problem before tile makes repairs expensive.

Long-term maintenance requires more than wiping the walls. Check flexible sealant at corners, joints, and around fixtures every year. Replace cracked or separated sealant promptly. Grout is not the primary waterproof barrier, so damaged grout still deserves attention. Keep the drain clear of hair and soap buildup. Watch for loose tiles, musty odors, soft baseboards, or darkening near the shower floor. I once underestimated a tiny corner gap; the repair became far larger than expected. That mistake still influences how carefully I inspect every transition.

Top 10 Tile Shower Membranes for Easy Waterproofing? — Common Installation Mistakes and Long-Term Maintenance Tips

Rank Membrane Type Form and Typical Installation Location Typical Thickness / Build Waterproofing Characteristics Installation Difficulty Common Installation Mistakes Long-Term Maintenance Tips Best Use Case
1 Sheet Polyethylene Membrane Factory-made sheet installed over cement backer board or approved wall substrates; seams are sealed with compatible banding and thin-set mortar. Usually about 0.5 mm, excluding seam treatments and overlaps. Very low water absorption; provides a continuous waterproof layer when seams, corners, valves, and penetrations are properly sealed. Moderate Leaving pinholes, cutting around pipe penetrations too generously, using incompatible adhesives, or failing to seal inside and outside corners. Inspect grout, sealant joints, and exposed transitions annually. Replace cracked movement-joint sealant rather than filling it with grout. Standard residential showers where predictable sheet coverage and fast waterproofing are desired.
2 Cementitious Waterproofing Membrane Powder mixed with liquid or water and applied by brush, roller, or trowel over approved masonry or backer-board surfaces. Two or more coats; final thickness must follow the manufacturer’s wet- or dry-film requirement. Seamless coating that bonds well to mineral surfaces; generally does not provide crack-bridging performance equal to flexible sheet membranes unless specifically designed for it. Moderate Applying coats too thin, adding excess water, coating dusty or damp surfaces, and covering the membrane before the required cure time. Keep surface cleaners compatible with cement-based grout and sealants. Monitor corners and changes of plane for movement or cracking. Concrete or masonry shower areas and installations where a brush-applied system is convenient.
3 Liquid Elastomeric Membrane Ready-to-use liquid applied by roller, brush, or trowel over compatible backer board; reinforcing fabric is commonly required at joints and corners. Multiple coats to a specified cured-film thickness; coverage rate alone should not be used to estimate final thickness. Flexible, continuous waterproofing with useful crack-bridging capability when applied at the specified thickness and allowed to cure fully. Moderate Skipping reinforcement, stretching material too far, creating thin spots behind fixtures, and installing tile over uncured material. Keep penetrations and sealant joints intact. Avoid drilling through the waterproofing; use surface-mounted accessories whenever practical. Complex layouts with many corners, niches, or irregular shapes that are difficult to cover with rigid sheets.
4 PVC Sheet Membrane Flexible sheet installed on the shower floor or as a pan liner; seams are generally solvent-welded or treated according to the approved system. Common shower-pan liners are approximately 0.75 mm to 1.0 mm, depending on the system. Highly water-resistant and well suited to traditional mortar-bed shower pans when properly clamped or connected to the drain assembly. Moderate Using nails or screws below the permitted height, puncturing the liner at the curb, folding corners incorrectly, or blocking the drainage path at the liner. Keep the drain grate and weep holes free of debris. Repair damaged sealant at the curb and avoid fasteners through the pan-liner area. Traditional mortar-bed shower floors with a compatible three-piece or approved bonding-flange drain assembly.
5 CPE Sheet Membrane Flexible chlorinated polyethylene sheet used for shower pans, walls, or specialty waterproofing details with compatible solvent-welded seams. Often about 0.75 mm to 1.0 mm, although the specified system controls the required material. Durable, flexible sheet with strong resistance to moisture and many common construction chemicals; detailing quality remains critical. Moderate Mixing materials from unapproved systems, poor solvent-welded seams, inadequate corner folds, and installing over sharp or uneven substrates. Check movement joints and drain connections periodically. Do not use aggressive solvents or abrasive tools on exposed sealant and trim. Traditional shower-pan construction where flexible sheet detailing and welded seams are preferred.
6 Sheet Membrane with Bonded Drain Flange Waterproof sheet is bonded directly to a compatible drain flange, typically over a sloped mortar bed or prefabricated shower base. Sheet thickness varies by system; the drain connection is usually reinforced with a factory-made or system-specific flange detail. Reduces reliance on clamping-ring drainage and can provide direct surface drainage when the complete system is installed correctly. Moderate Failing to create a continuous slope, bonding the sheet to a dirty flange, leaving wrinkles under the drain connection, or using the wrong drain component. Clean the drain cover and verify that water flows freely. Keep silicone or approved sealant joints flexible and replace failed sections promptly. Low-profile shower renovations and installations requiring a surface-applied waterproofing layer.
7 Fabric-Reinforced Liquid Membrane Liquid waterproofing combined with embedded reinforcing fabric at seams, corners, transitions, and other movement-prone areas. Liquid coats plus embedded fabric; required thickness and fabric overlap depend on the tested system. Provides a flexible reinforced layer and can simplify waterproofing around penetrations and transitions when the fabric is fully embedded. Moderate Leaving fabric edges exposed, failing to overlap reinforcement, trapping air bubbles, and applying the liquid over contaminated surfaces. Inspect the tile assembly for cracked grout or failed sealant. Do not rely on grout as the waterproofing layer. Showers with numerous transitions, benches, niches, or substrate changes requiring reinforced detailing.
8 Waterproof Foam Backer Board System Closed-cell foam panels serve as both substrate and waterproofing layer; joints and fasteners are sealed with system-approved components. Panel thickness commonly ranges from about 6 mm to 50 mm or more for specialty profiles and built-up areas. Lightweight, dimensionally stable, and moisture-resistant; eliminates the need for a separate membrane where the complete panel system is approved for wet areas. Easy–Moderate Using ordinary drywall screws, leaving fastener heads unsealed, misaligning panels, or mixing unapproved tapes, sealants, and accessories. Use only compatible repair materials for penetrations. Maintain surface sealant at shelves, benches, niches, and fixture penetrations. Fast renovations, lightweight construction, niches, benches, and layouts where panel shaping is useful.
9 Peel-and-Stick Sheet Membrane Self-adhering sheet applied to a clean, properly prepared substrate; seams and perimeter edges are rolled or sealed as specified. Commonly about 0.5 mm to 1.5 mm, excluding overlaps and accessory pieces. Can provide rapid coverage with limited liquid mixing; adhesion depends heavily on substrate preparation, temperature, pressure, and compatibility. Moderate Applying over dusty, cold, wet, or porous surfaces without required primer; stretching the sheet; trapping wrinkles; or contaminating the adhesive. Protect the membrane from punctures during tile work. Repair any cuts before covering and keep movement-joint sealant serviceable. Small shower areas and controlled indoor conditions where the substrate can be prepared precisely.
10 Hot-Mop Asphalt Shower Pan Multiple layers of hot-applied asphalt felt installed by a qualified specialist over a properly sloped shower base and integrated with the drain. Built from several asphalt-impregnated layers; final build depends on the local method and specification. Creates a robust pan liner for traditional mortar-bed showers, but quality depends strongly on installer skill, temperature control, detailing, and local acceptance. Advanced Insufficient slope, incomplete drain integration, poor curb detailing, inadequate cooling or inspection, and puncturing the pan after installation. Keep the drain and weep paths clear. Avoid any fastener that penetrates the pan and repair damaged curb or perimeter sealant. Traditional construction in regions where qualified hot-mop installation is available and permitted.

Important installation note: Actual thickness, curing time, substrate preparation, fastener placement, drain connection, and seam treatment must follow the complete waterproofing system’s tested instructions and applicable local building codes. Tile, grout, and caulk are not substitutes for a properly continuous shower waterproofing system.

Resources

Copyright © CUSTOM Building Products 2025
Products | Resources | Interactive Tools | Warranties | Privacy Policy | Terms of Use | Technical Training