What Is the Best Liquid Shower Membrane?
Choosing the best liquid shower membrane is not simply a matter of picking the thickest product or the cheapest bucket. A reliable waterproofing system must match the shower’s substrate, drainage design, tile finish, and installation conditions. Concrete, cement board, and approved gypsum panels can behave differently under moisture and movement. The membrane must also form a continuous barrier around corners, niches, benches, and pipe penetrations. Small gaps can create serious problems.
Details matter most.
This guide examines how liquid shower membrane products perform in real bathroom environments. It considers coverage rates, drying time, crack-bridging ability, adhesion, flexibility, and compatibility with thin-set mortar. Product instructions and relevant testing standards deserve close attention. Independent certifications can provide useful evidence, but they do not replace correct installation. Even a high-quality membrane can fail when applied too thinly, mixed incorrectly, or covered before curing. That uncomfortable point is easy to overlook.
The discussion will also compare roller-applied and brush-applied systems, including their handling around awkward corners. A dependable installer checks the film thickness instead of trusting appearance alone. Some products look fully covered while remaining dangerously thin near edges. Others cure slowly in cool, humid rooms. No membrane is perfect. The best choice depends on the entire assembly, not one impressive label. By weighing technical data, job-site experience, and manufacturer guidance, readers can make a more confident decision and avoid expensive moisture damage hidden behind beautiful tile.
What Is a Liquid Shower Membrane and How Does It Work?
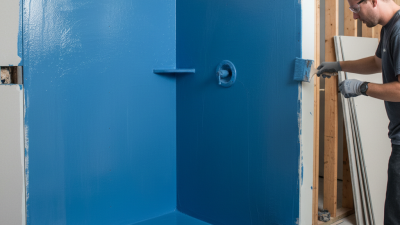
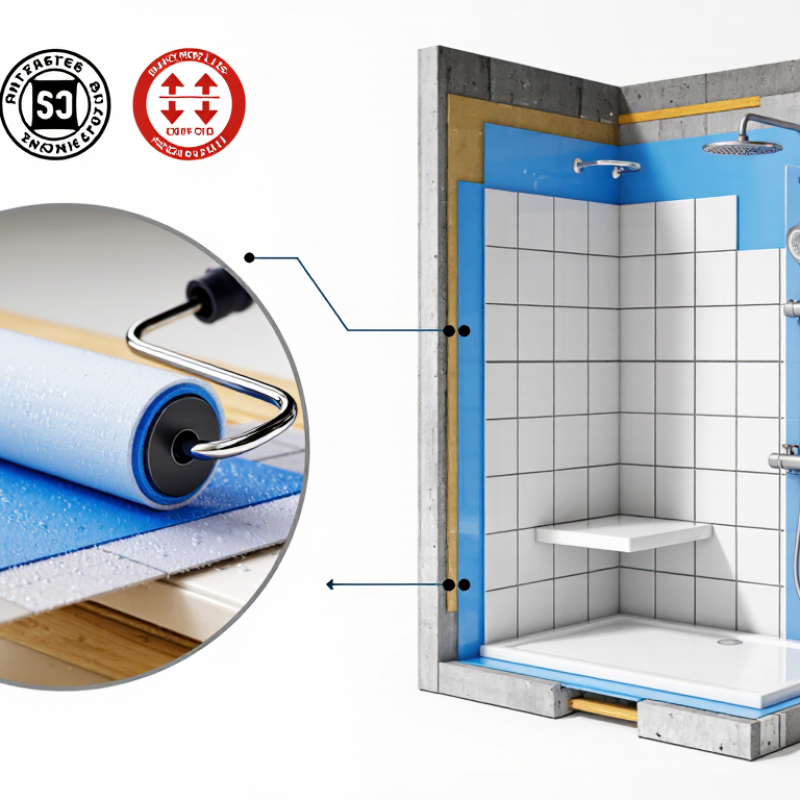
A liquid shower membrane is a waterproof coating applied directly to walls and floors. It usually contains polymers that form a flexible, continuous barrier after drying. A brush, roller, or trowel can spread it across cement board, concrete, and other approved surfaces.
It works by blocking water before moisture reaches the framing or subfloor. Corners, seams, screw holes, and pipe openings need extra attention because they are common weak points. The coating should cover these areas evenly, without thin patches or visible gaps. It is not magic. Surface preparation matters most.
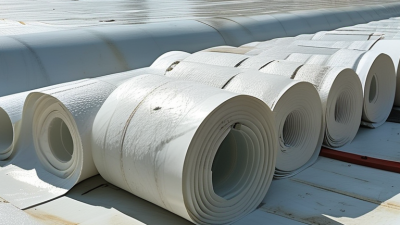
The substrate must be clean, dry, stable, and free from dust or grease. Many systems require two coats, with enough drying time between them. A wet-film gauge can help check coverage, although it is easy to skip this step on a busy project. That choice can create problems later. Reinforcing fabric may improve protection at moving joints and inside corners. The membrane should also connect carefully with the shower drain and threshold. Before tiling, inspect the entire surface under bright light. Some installers perform a controlled water test after curing, following the product instructions and local building requirements. I would not call any membrane foolproof; poor detailing can defeat even a high-quality coating.
Key Factors for Evaluating Liquid Shower Membrane Quality
What Is the Best Liquid Shower Membrane?
Quality begins with documented performance, not a glossy label. ANSI A118.10 evaluates bonded, waterproof membranes under water exposure and dimensional stress. ASTM C1305 also measures crack-bridging ability, a practical concern around corners and movement joints. Look for tested results, not vague claims.
On site, I check the substrate first. It must be clean, stable, and properly sloped toward the drain. A wet-film thickness gauge helps verify coverage. Thin areas often appear beside niches, fasteners, and drain flanges. The Tile Council of North America’s 2024 Handbook emphasizes continuous waterproofing and careful transitions at changes in plane. These details matter more than color.
A reliable membrane should also show strong adhesion data, reasonable curing time, and clear application limits. ASTM D4541 pull-off testing can help compare adhesion values, although laboratory results may not match a dusty jobsite. I still distrust products that hide coverage rates. The 2023 TCNA Handbook guidance commonly supports a 24-hour flood test before tile installation, where local practice permits. Do not rush this step. One weakness remains: even good membranes fail when installers guess thickness or ignore curing conditions. Quality is partly chemistry, but mostly disciplined execution.
Types of Liquid Shower Membranes and Their Best Uses
Liquid shower membranes differ in chemistry, flexibility, and installation tolerance. Cementitious liquid membranes suit stable concrete floors and masonry walls. They create a mineral-like surface and accept tile quickly. However, they can struggle when a substrate moves.
Acrylic or elastomeric membranes work better over wood-based walls and minor cracks. Their flexibility helps around shower corners, benches, and pipe penetrations. Polyurethane membranes offer stronger moisture resistance and crack-bridging performance. They are useful in frequently used showers and demanding wet rooms. Hybrid formulas combine cement and polymers, making them practical for renovation work.
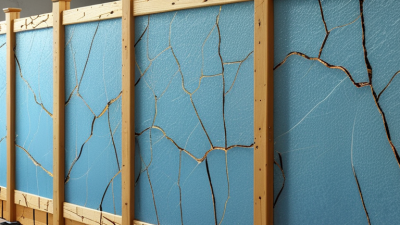
The Tile Council of North America Handbook emphasizes continuous waterproofing, correct overlaps, and sealed penetrations. ANSI A118.10 evaluates liquid membranes for water resistance and dimensional stability. ASTM C1305 also examines crack bridging across a 1/8-inch opening. These tests matter more than a product’s thickness claim. In practice, I have seen excellent membranes fail beside an unsealed mixing valve. The weak detail usually wins.
Tips: Match the membrane to the substrate, not the tile. Check the required wet-film thickness with a gauge. Mark corners before coating them. Keep the membrane off dusty surfaces. Follow the manufacturer’s curing time, even when the surface feels dry. A 2024 industry bathroom remodeling survey from Houzz reported that larger showers remain a major homeowner preference, increasing the importance of reliable coverage around benches and niches. Still, bigger is not always easier. More corners create more opportunities for water intrusion.
How to Apply a Liquid Shower Membrane Step by Step
Choosing the best liquid shower membrane starts with the installation, not the label. A reliable product should form a continuous waterproof layer, remain flexible, and suit the substrate. Always read its technical data sheet. Coverage rates and drying times vary.
Prepare the shower area carefully. Remove dust, paint, grease, and loose mortar. Repair cracks and fill deep joints. The surface must feel firm and reasonably dry. Check the floor slope toward the drain. Water should not collect beside the drain flange. It sounds obvious. It is often missed.
Brush the membrane into corners, wall-to-floor joints, screw heads, and pipe openings. Embed compatible reinforcing fabric while the first coat is still wet. Extend the membrane above the showerhead and beyond the splash zone. Let that coat dry fully. Then apply a second coat in the opposite direction, keeping the specified wet-film thickness. Thin coats can leave weak spots. Thick coats may cure unevenly. I once hurried this stage and found a soft area near a corner the next day. It needed scraping and repair.
Inspect the surface under bright light. Look for pinholes, bubbles, and uncovered edges. Reinforce any questionable area before tiling. Follow the stated curing period, even if the surface feels dry. A flood test may be required before tile installation, depending on local building rules and the drainage design. Record the date, product batch, coat coverage, and test result. Small records help explain problems later.
Common Installation Problems and Long-Term Maintenance Needs
The best liquid shower membrane is not simply the thickest product. It is the system that matches the substrate, drain, corners, and installer’s method. ANSI A118.10 classifies bonded waterproof membranes for wet areas, while the TCNA Handbook 2024 stresses continuous coverage and compatible transitions. A missed pinhole behind a niche can matter more than a premium label.
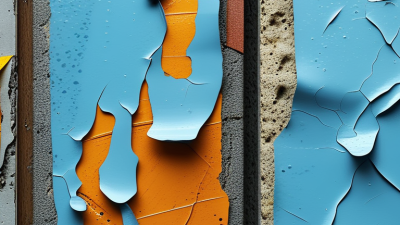
Installation mistakes usually appear at changes in direction. Corners may receive too little coating. Drain flanges may stay dusty. Some installers also apply the second coat before the first one has cured. That traps moisture and can create soft, uneven areas. Follow the manufacturer’s wet-film thickness, curing window, and flood-test instructions. Many specifications require a 24-hour water test, although local requirements can differ. Do not trust a quick visual check.
Maintenance is less dramatic, but often neglected. The U.S. Environmental Protection Agency estimates household leaks waste nearly 10,000 gallons of water annually, showing how small failures accumulate. Inspect grout joints, sealant lines, and drain edges every few months. Look for darkened corners, loose trim, or a musty smell. Keep the exhaust fan running during and after showers; the EPA recommends indoor humidity between 30% and 50%. Harsh scraping can damage surface layers. Use a soft brush and a mild cleaner instead. My own installation review would include photographs before tiling, because hidden work is difficult to prove later. Still, photos cannot replace a proper flood test.
Liquid Shower Membranes: Installation Priorities
Ratings show relative attention priorities on a qualitative 1–5 scale, not measured failure rates. Careful substrate preparation, full coverage at corners and seams, and meeting the specified coating thickness and cure time help reduce installation problems. Follow the membrane manufacturer’s instructions for application and maintenance.