
7 Tips for Choosing Crack Suppression Membrane?

Choosing the right crack suppression membrane is not merely a product comparison. It is a decision about movement, moisture, adhesion, and long-term floor performance. A membrane may look suitable on a sample board, yet fail over a cold joint or an actively moving crack. That difference matters.

In practical flooring assessments, I look beyond thickness and marketing claims. I check the substrate condition, crack width, moisture readings, expected traffic, and installation environment. Concrete age matters too. So does temperature. A membrane designed for ceramic tile may not suit natural stone, resilient flooring, or polished concrete. The seven tips in this guide focus on these real project conditions, not attractive claims alone.

Read the technical data sheet carefully. Confirm whether the product has independent test results, clear movement ratings, and documented compatibility with your adhesive or mortar. Manufacturer guidance should explain surface preparation, primer use, curing time, and allowable moisture levels. If those details are vague, caution is reasonable. A strong warranty helps, but it cannot repair poor preparation.

There is no universal membrane for every floor. That is easy to forget. The best choice balances crack movement, installation method, budget, and future maintenance. Sometimes the cheapest roll creates the most expensive repair. Sometimes an over-specified product adds cost without meaningful protection. Careful judgment is still required, and even experienced installers can miss hidden moisture or structural movement. These tips provide a practical framework, but a qualified flooring professional should assess serious or recurring cracks before installation.
7 Tips for Choosing Crack Suppression Membrane?

Understanding the Purpose and Function of Crack Suppression Membranes

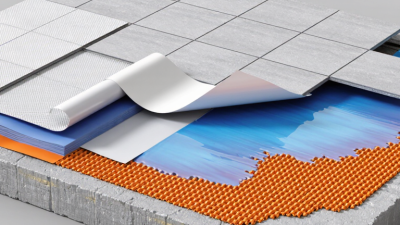
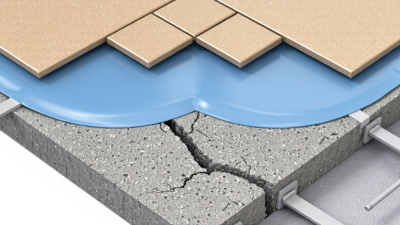
A crack suppression membrane is more than a sheet placed beneath tile. It is a flexible layer designed to reduce stress transfer from a moving substrate to the finished surface. Concrete can shrink, expand, or shift slightly as moisture and temperature change. The membrane helps absorb these movements.

It does not repair unstable concrete. That distinction matters.

When choosing one, identify the crack pattern, substrate, moisture conditions, and final covering. A narrow, dormant crack needs a different response from a joint that continues to move. Check the membrane’s published movement rating, thickness, installation method, and compatibility with the adhesive or mortar.

On a renovation site, I would also inspect dust, hollow areas, and uneven edges before selecting a product. A clean surface is essential. So is patience.

Use a membrane rated for the actual environment, including bathrooms, balconies, or heated floors. Some systems manage vapor; others focus mainly on crack isolation. Do not assume they perform the same job. Follow the technical data sheet, especially coverage, seam treatment, curing time, and allowable tile size.

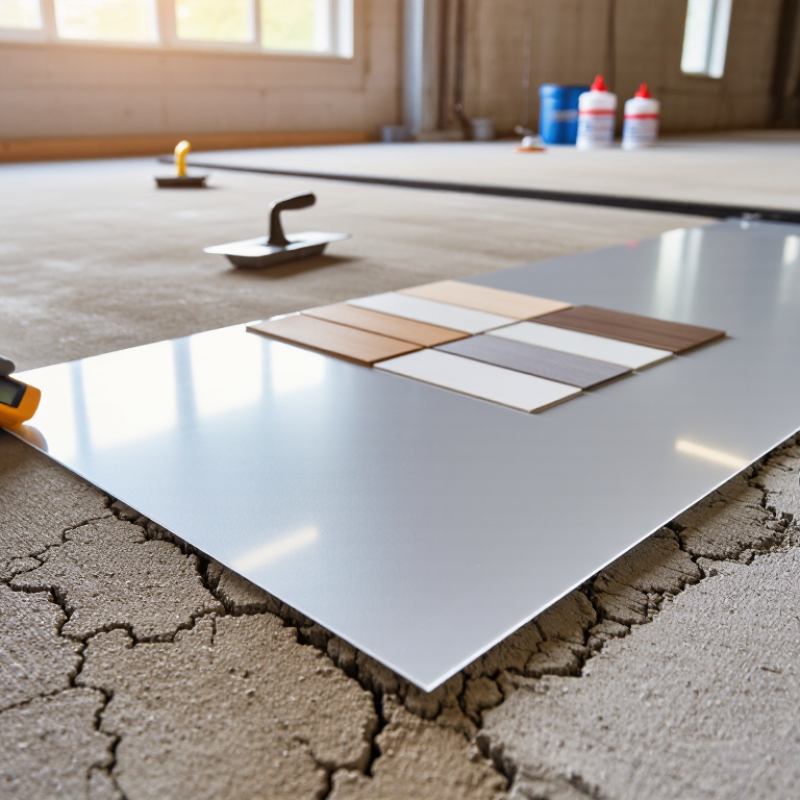
Small installation shortcuts can create large failures. A practical test area can reveal problems early. Install a small section, then watch for curling, poor adhesion, or visible ridges under the covering. This step feels slow, but replacing cracked tile is slower. I have seen specifications treated as suggestions, which is an avoidable mistake. Still, every substrate behaves differently. Measure, photograph, and record conditions before installation. Reliable decisions come from evidence, not optimistic guesses.
Assessing Surface Conditions and Expected Crack Movement

7 Tips for Choosing Crack Suppression Membrane?

Assessing Surface Conditions and Expected Crack Movement

Choosing a crack suppression membrane starts with inspecting the substrate, not the product label. The surface should be structurally sound, clean, dry, and free from oil, dust, curing compounds, and loose concrete. A clean-looking slab can still be unsuitable. Check for hollow areas, weak edges, moisture vapor, and uneven surfaces before installation.

Measure existing cracks and note their location. Hairline cracks may remain stable, while cracks near walls, columns, or control joints can continue moving. Record the crack width, direction, and whether it changes after temperature shifts. Membranes differ in flexibility, thickness, and movement tolerance. Select one that matches the expected movement, not merely the current appearance. When movement is uncertain, consult a qualified flooring professional or structural engineer.

I have learned that preparation is often underestimated. A membrane cannot correct major structural movement or replace proper joint treatment. Repair unstable areas first, then follow the specified primer, coverage rate, drying time, and installation temperature. Small test sections can reveal adhesion problems before the full area is covered. Check the substrate again after preparation. In practice, the most reliable choice balances surface condition, crack behavior, moisture exposure, and the finished flooring system.

7 Tips for Choosing Crack Suppression Membrane? - Assessing Surface Conditions and Expected Crack Movement

Tip Surface Condition to Assess Expected Crack or Joint Movement Recommended Membrane Characteristics Key Checks Before Selection
1. Identify the Crack Type Determine whether the defect is a shrinkage crack, dormant structural crack, moving crack, control joint, or construction joint. Record its width, depth, location, and pattern. Hairline and dormant cracks may have limited change, while active cracks can open and close with temperature, drying, or structural loading. Select a membrane rated for the specific crack-bridging requirement. A crack-suppression membrane is not a substitute for structural crack repair. Use visual mapping and crack-width measurements. If the crack is structurally significant, obtain an assessment from a qualified professional before installing tile or other finishes.
2. Measure Crack Width and Movement Measure cracks at several points and note whether the edges are flush, offset, hollow-sounding, or continuing through the substrate. Movement is often influenced by thermal cycling, moisture variation, settlement, vibration, and live loads. Crack width alone does not define total movement. Choose a product with documented crack-isolation or crack-bridging performance that matches the anticipated movement and installation conditions. Review technical data for test methods, movement limits, curing conditions, and whether performance applies to thin-bed tile installations or other finish systems.
3. Check Moisture and Dampness Evaluate concrete moisture, visible dampness, hydrostatic pressure, drainage, and possible vapor transmission. Newly placed concrete also requires adequate curing. Moisture changes can cause concrete shrinkage, expansion, bond stress, efflorescence, and recurring crack movement. Use a membrane compatible with the measured moisture condition. Where waterproofing is required, select a system specifically tested for that function. Follow the membrane manufacturer’s moisture limits and test procedures. Do not use a crack membrane to correct active leaks or hydrostatic pressure.
4. Confirm Surface Soundness Look for laitance, dust, weak concrete, delamination, oil, curing compounds, paint, adhesive residue, and areas that sound hollow when lightly tapped. A weak or poorly bonded surface can move independently, causing membrane delamination even when the membrane itself has adequate flexibility. Select a membrane with documented bond performance for the prepared substrate and intended adhesive or mortar system. Remove contaminants and unsound material. Mechanically prepare the surface when needed, then ensure it is clean, stable, and suitable for bonding.
5. Respect Existing and Structural Joints Locate expansion joints, isolation joints, construction joints, control joints, and perimeter gaps before laying out the membrane and finish. These joints are designed to accommodate planned movement and generally require movement to remain continuous through the finish assembly. Use a system with compatible joint treatments, reinforcing components, and sealant details rather than simply covering the joint with a continuous rigid layer. Maintain the joint location through the membrane and finished surface as required by the project specifications and applicable installation standards.
6. Match the Membrane to the Environment Consider interior or exterior exposure, temperature range, sunlight, freeze-thaw cycles, wet areas, chemical exposure, and traffic level. Outdoor temperature swings and moisture cycling can create greater dimensional change than stable interior conditions. Choose a membrane whose published service conditions, adhesion, flexibility, and durability are suitable for the actual environment. Verify compatibility with the substrate, setting material, tile or finish, drainage design, and any required waterproofing or vapor-management function.
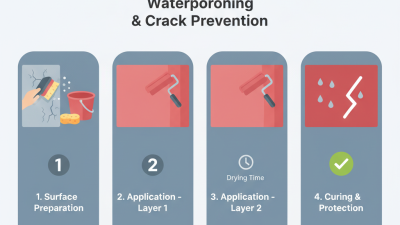
7. Verify Installation and System Compatibility Review substrate flatness, surface temperature, ambient conditions, coverage requirements, curing time, and the sequence of repairs and installation. Improper thickness, incomplete coverage, premature loading, or incompatible materials can reduce crack-isolation performance and reproduce defects. Select a complete, compatible system with clear instructions for primers, mortars, reinforcing fabric, transitions, penetrations, and movement joints. Confirm required tools, coverage rates, open time, cure time, inspection points, and installer qualifications. Perform a small trial area when conditions are uncertain.

Important: Crack-suppression membranes help reduce the transfer of certain substrate cracks to bonded finish materials, but they do not repair structural problems, eliminate active movement, or replace properly designed and treated movement joints.

Comparing Membrane Materials, Thicknesses, and Performance Ratings

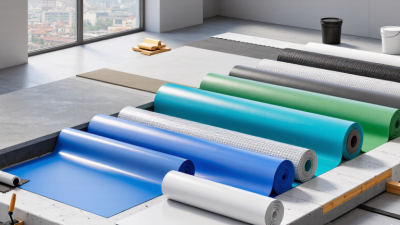
Choosing a crack suppression membrane starts with the substrate and the movement expected beneath the finish. Liquid-applied membranes form a continuous film around corners, drains, and irregular surfaces. Sheet membranes provide consistent thickness and faster visual inspection. Fabric-reinforced options can improve tensile strength, but installation still matters.

Thickness is not a simple “more is better” decision. A thin layer may suit minor, stable cracking, while a thicker system can offer greater crack-bridging capacity. Excess material may create curing problems or height conflicts at doorways. Follow the tested application rate, not a guessed measurement. A wet-film gauge helps verify coverage before the surface disappears.

Performance ratings deserve careful reading. Check crack-bridging movement, tensile strength, elongation, bond strength, and water resistance. For tile installations, applicable standards such as ANSI A118.12 can provide useful comparison points. However, ratings often reflect controlled laboratory conditions, not dusty concrete, cold floors, or rushed preparation. Inspect the slab for moisture, loose particles, and sharp ridges. Clean edges matter.

Small details decide results. Use the recommended primer, reinforce joints when specified, and respect curing times between coats. A membrane can be technically strong yet fail over a contaminated surface. That is the uncomfortable part: product selection cannot repair poor preparation. Rechecking the substrate may feel slow, but it is usually cheaper than removing cracked flooring later.

Checking Compatibility with Substrates, Adhesives, and Floor Finishes

Choosing a crack suppression membrane starts with the surface beneath it.

In field inspections, I check moisture, movement, cleanliness, and bond strength before opening a pail. Concrete may look dry while retaining vapor below the surface. Use a moisture meter and follow the product’s stated limits.

Do not guess.

Compatibility with the substrate is equally important. Wood panels, gypsum underlayment, concrete, and old tile respond differently under stress. Confirm that the membrane suits the substrate’s movement and surface profile.

Remove dust, curing compounds, wax, and weak patches. Test a small area.

Blistering, curling, or poor adhesion may appear within one day.

The adhesive must bond reliably to both the membrane and the finished flooring. Check technical data for the complete assembly, including primer, adhesive, grout, and floor finish.

Stone, ceramic tile, luxury vinyl, and sheet goods can require different adhesive systems and flatness tolerances.

Keep batch numbers, temperatures, and curing times in your records.

I once treated a minor temperature change as harmless, but the bond later required investigation.

That mistake changed my practice. Now, I build a sample panel under actual site conditions and inspect it before full installation.

Evaluating Installation Requirements, Durability, Cost, and Maintenance

7 Tips for Choosing Crack Suppression Membrane

Choosing a crack suppression membrane starts with the installation area, not the product label. Inspect the substrate for dust, oil, loose material, moisture, and active cracks. A clean, stable surface matters. Check whether the membrane suits concrete, plywood, or an existing tile surface. Confirm required temperatures, curing time, primer use, and coverage rates. Small details can change the result.

Durability depends on movement, moisture, and traffic. Measure visible crack widths and examine joints near doorways or walls. A flexible membrane may handle minor movement, but it cannot correct structural problems. Ask for test data on tensile strength, elongation, water resistance, and service temperatures. Do not rely on vague claims. Laboratory results also need practical context. Heavy commercial areas require tougher performance than a quiet residential room.

Cost should include labor, primers, tools, downtime, repairs, and future replacement. The cheapest roll may demand extra preparation or fail sooner. Maintenance is often simple, but not effortless. Keep installation records, batch details, coverage estimates, and photographs before covering the membrane. Inspect tiled surfaces for hollow sounds, loose grout, or recurring cracks. One imperfect assumption can become an expensive repair. When site conditions remain uncertain, obtain written technical guidance from a qualified flooring professional.

Resources

Copyright © CUSTOM Building Products 2025
Products | Resources | Interactive Tools | Warranties | Privacy Policy | Terms of Use | Technical Training