
Why Use a Decoupling Membrane for Tile Installation?

Tile installation looks simple until a grout joint opens beside a doorway or a crack telegraphs through a large-format tile. These failures often reflect movement, moisture, or inadequate substrate preparation. A decoupling membrane creates a designed separation between the tile assembly and the supporting surface. It helps reduce stress transfer without pretending to eliminate every installation risk.

The Tile Council of North America’s 2024 Handbook emphasizes movement accommodation, substrate evaluation, and appropriate underlayment selection. ANSI A118.12 also provides performance classifications for crack-isolation membranes under laboratory conditions. These standards offer useful benchmarks, not guarantees. Actual results still depend on bonding, coverage, movement joints, and curing conditions.

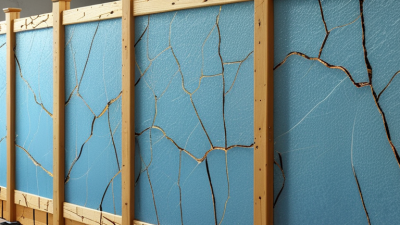
In practice, the difference can be visible. Imagine a concrete slab with a fine diagonal crack beneath a 600-millimeter porcelain tile. Without a suitable system, that weakness may reappear at the tile surface. With a properly specified membrane, stress can be managed across the assembly. The installer must still honor perimeter gaps and structural joints.

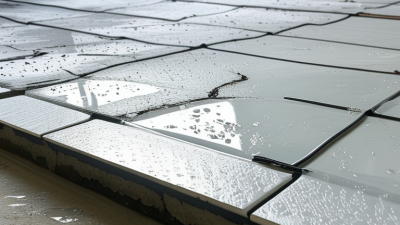
NTCA training materials repeatedly stress that installation quality influences long-term performance. That point is easy to underestimate. A premium membrane cannot rescue dusty concrete, poor mortar coverage, or rushed workmanship. The 2023 U.S. Houzz & Home Study also shows that homeowners continue investing in renovation projects, increasing the need for durable installation decisions. Yet durability should be judged realistically. A decoupling membrane is valuable risk management, not a magic shield. Its purpose becomes clearer when project conditions, standards, and field experience are considered together.
Why Use a Decoupling Membrane for Tile Installation?

What Is a Decoupling Membrane?

What Is a Decoupling Membrane?

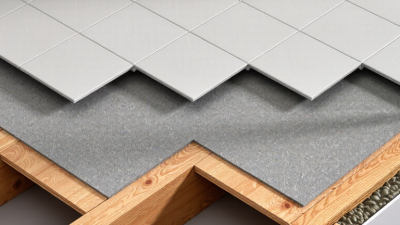
A decoupling membrane is a thin layer installed between the subfloor and tile. It separates two materials that move differently. Wood framing can expand, contract, or flex. Concrete can shrink, crack, and release moisture over time. The membrane helps reduce stress transferred into the tile surface and grout joints.

Its structure usually includes a textured surface, a bonding layer, or a cavity system. These features can improve mortar contact and create limited movement accommodation. The Tile Council of North America Handbook describes membranes as part of a tested tile assembly, not as a stand-alone guarantee. That distinction matters. A membrane cannot correct weak plywood, excessive deflection, or poor mortar coverage.

Testing also gives installers useful boundaries. ASTM C627 evaluates tiled floor assemblies under repeated rolling loads reaching 300 pounds. ANSI A118.12 separately addresses crack-isolation performance for some membrane systems. These standards show why installation details matter. They do not mean every membrane performs identically.

On site, I look for a clean substrate, correct fastener spacing, and full mortar contact beneath each tile. I also check movement joints near walls and large open areas. Small mistakes can remain hidden until winter heating begins. The membrane helps, but it is not a magic shield. Choosing one without checking the complete assembly is still a risky shortcut.
How Does a Decoupling Membrane Work?

A decoupling membrane creates a flexible separation layer between the tile and the subfloor. This layer helps reduce stress caused by movement, shrinkage, and temperature changes. Without it, these forces can transfer directly into the tile surface.

The membrane does not simply “float” beneath the tiles. Its textured surface grips the mortar, while its underside helps manage small movements in the subfloor. Some membranes also control moisture or provide waterproofing when installed as part of a tested system. However, they cannot correct a weak, unstable, or poorly prepared floor. That assumption is not always correct. The subfloor still needs proper cleaning, firmness, and suitable flatness before installation.

Tips: Check the floor for cracks, dust, loose areas, and moisture concerns. Follow the mortar type and coverage requirements specified for the membrane system. Press the membrane firmly into fresh mortar, avoiding trapped air beneath it. Keep joints aligned with the planned tile layout. On site, installers sometimes rush this step, then discover hollow spots later. A small inspection before tiling can prevent expensive repairs. Allow the mortar to cure as directed, even when the surface feels dry.

Why Use a Decoupling Membrane for Tile Installation? - How Does a Decoupling Membrane Work?

Performance or Installation Dimension How a Decoupling Membrane Works Practical Benefit for Tile Installation Important Limitation or Requirement
Primary purpose Creates a separation layer between the tile assembly and the substrate, allowing limited in-plane movement between the two layers. Helps reduce the transfer of substrate movement and stress to the tile and grout assembly. It does not correct structural movement, inadequate framing, or excessive substrate deflection.
Movement management The membrane’s internal structure permits controlled horizontal movement while maintaining contact with the mortar layers. Provides an additional layer of protection where concrete shrinkage, thermal changes, or substrate transitions may occur. Movement joints and perimeter gaps are still required according to project conditions and applicable tile standards.
Crack isolation Some membranes are designed and tested to isolate limited existing non-structural cracks from the tile surface. Can reduce the risk of reflective cracks appearing through tile or grout. Crack-isolation performance is product-specific. A membrane should be selected according to its published test classification and limitations.
Waterproofing capability Some membranes are waterproof when seams, corners, penetrations, and transitions are treated as part of a complete system. May provide a continuous water-management layer in bathrooms, wet rooms, and other moisture-prone areas. Not every decoupling membrane is waterproof. Waterproof performance should be confirmed through the relevant product documentation and testing classification.
Typical sheet thickness Many sheet-type membranes are approximately 3 mm, or about 1/8 inch, thick; actual thickness varies by construction. Usually adds less height than a traditional mortar bed while still providing separation and, in some systems, waterproofing. The exact thickness must be included in transitions, door clearances, drains, and adjacent flooring details.
Substrate requirements The membrane is bonded to a properly prepared substrate using a compatible thin-set mortar or adhesive specified for the system. Allows tile installations over approved concrete, cement-based underlayments, and certain wood or other substrates. The substrate must be clean, sound, sufficiently flat, and within the required moisture and deflection limits.
Installation sequence Mortar is spread on the prepared substrate, the membrane is embedded into the mortar, and the tile is installed over the membrane with compatible mortar. Creates a planned multi-layer assembly instead of bonding tile directly to the substrate. Proper mortar coverage, membrane contact, seam treatment, and curing time are essential to system performance.
Tile compatibility The tile is bonded to the membrane through the mortar layer rather than directly to the structural substrate. Supports many common ceramic and porcelain tile applications when the membrane and mortar are approved for the selected tile. Large-format tile, natural stone, moisture-sensitive tile, and heavy-use areas may require additional system-specific requirements.
Load-bearing function Transfers tile loads through the mortar and membrane to the substrate; it is not a structural reinforcement layer. Helps preserve the tile installation without replacing proper structural design. Joist spacing, subfloor construction, deflection, and live-load requirements must be addressed before membrane installation.
Standards and classifications Performance may be evaluated under different industry categories, including crack-isolation or waterproofing classifications. Provides a clearer basis for matching membrane performance to the project environment. A classification for one function does not automatically confirm performance for another function; verify the specific intended use.
Best-use situations Often selected for substrates exposed to moderate movement, transitions between substrate materials, renovations, or areas requiring additional moisture management. Can improve installation reliability when direct tile bonding presents a higher movement or moisture risk. It is not automatically necessary for every tile project and should not be used to conceal defective preparation.
Key takeaway: A decoupling membrane separates the tile assembly from the substrate, helping manage limited movement and, in some systems, providing crack isolation or waterproofing. Final selection and installation should follow the membrane system’s technical documentation, applicable tile standards, and local building requirements.

When Should You Use a Decoupling Membrane?

Why Use a Decoupling Membrane for Tile Installation?

When Should You Use a Decoupling Membrane?

A decoupling membrane is useful when the tile surface may move differently from the substrate. This often occurs over plywood, concrete slabs, or older floors. Temperature changes can create stress beneath rigid tile. Small cracks may also expand over time. The membrane helps reduce this transfer. It does not repair structural damage. That distinction matters.

Consider using one during renovations, especially over sound but imperfect substrates. It can also support tile installations above radiant heating systems. Large-format tiles may benefit from extra protection against minor substrate movement. Kitchens, hallways, and commercial spaces often receive heavy foot traffic. A properly installed membrane can improve long-term reliability in these areas.

The substrate must still be clean, stable, and correctly prepared. Never cover loose concrete or active structural cracks. Fix those problems first. Check the membrane’s technical instructions, adhesive requirements, and local installation standards. Some membranes provide water management, but not all are waterproofing systems. Treating them as identical can create expensive failures. Movement joints remain necessary around walls, transitions, and large tiled areas. In practice, installers sometimes focus too heavily on the membrane and overlook flatness or mortar coverage. That is an easy mistake. Careful surface preparation still controls much of the final result.

How to Install a Decoupling Membrane for Tile

A decoupling membrane helps protect tile from minor movement in the substrate. It can reduce stress caused by shrinkage, temperature changes, or small cracks. Installation still depends on a stable, clean, and properly prepared surface.

Begin by removing dust, paint, grease, and loose concrete. Check the floor with a straightedge. High spots need grinding, while low areas may require a suitable patching compound. I once rushed this inspection, and uneven tile edges appeared later. That mistake was avoidable.

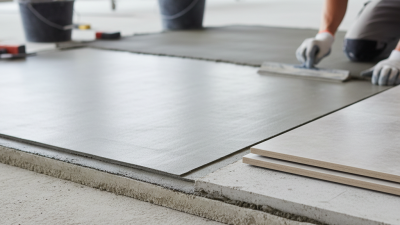
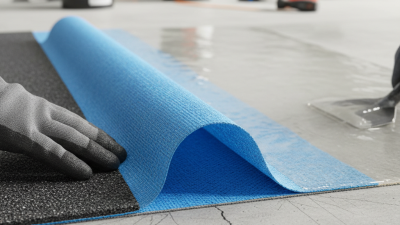
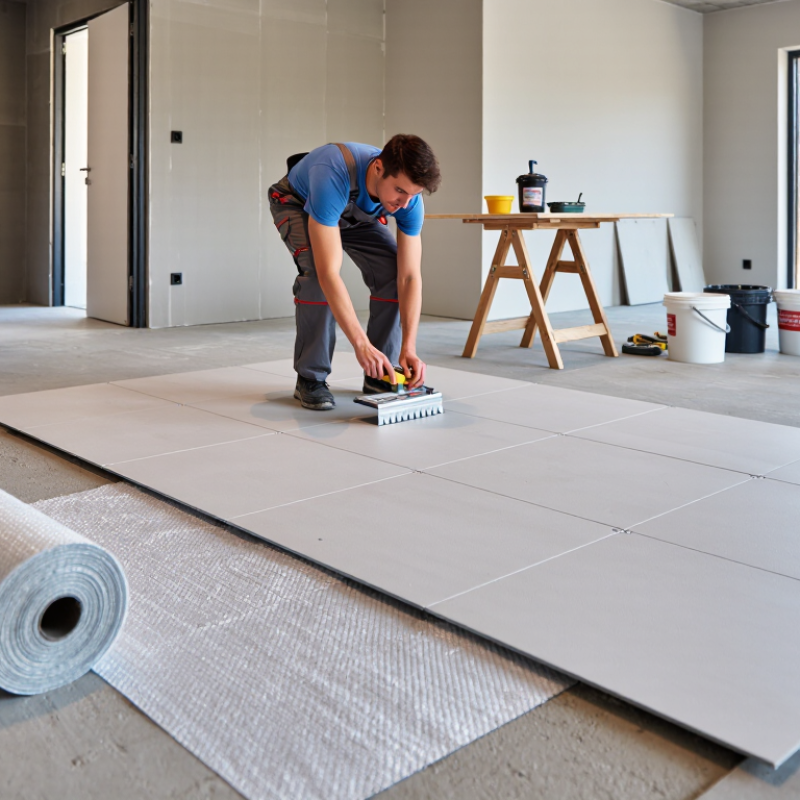
Mix the recommended thin-set mortar to a smooth, workable consistency. Spread it with the specified notched trowel, keeping the ridges even. Press the membrane into the fresh mortar with a float or flat trowel. Work from the center outward. This removes trapped air and improves contact. Lift one corner occasionally. The mortar should cover the membrane backing consistently.

Keep adjacent sheets aligned without overlapping them. Seal or treat seams according to the installation instructions. Do not stretch the material around corners. Cut it cleanly with a sharp utility knife. Allow the mortar to set for the stated time before placing tile. Some systems permit immediate tiling, but that detail varies. Follow the technical data, not guesswork. Plan movement joints around the room perimeter and through larger tiled areas. Small errors matter.

Why Use a Decoupling Membrane for Tile Installation?

A decoupling membrane separates the tile assembly from minor substrate movement and helps reduce stress transfer to the tile and grout. The chart shows a typical installation sequence and commonly required waiting periods; always follow the mortar and membrane manufacturer’s instructions.

Typical timing: allow the substrate and membrane mortar to reach the recommended cure stage before tiling, protect newly installed tile during grout curing, and avoid regular traffic until the complete system has sufficiently cured.

What Benefits and Limitations Should You Consider?

A decoupling membrane creates a separating layer between tile and substrate. In practice, it helps manage movement, shrinkage, and minor cracking below the tile surface. This matters over plywood, young concrete, or heated floors, where stresses can transfer upward. A properly installed membrane may reduce cracked grout and loose tiles. It also adds planning flexibility. Some systems provide waterproofing, sound reduction, or easier layout control. However, these features depend on the product and installation details. A membrane is not a cure-all. It cannot correct a weak, dirty, or badly sloped substrate. That lesson is easy to learn after tiles fail.

The main limitations are cost, added height, labor, and compatibility. The membrane can raise the finished floor, affecting doors, transitions, cabinets, and nearby rooms. Mortar coverage must be complete, especially beneath large-format tiles. Air pockets may create movement and fractured corners. Installers should check moisture, movement joints, substrate strength, and installation requirements before setting tile. I have seen membranes selected correctly but bonded poorly because dust remained on the slab. That was not only a membrane problem. It was an installation failure. Membranes also cannot replace structural repairs or properly designed expansion joints.

Tips: Press the membrane firmly into fresh mortar. Use a suitable notched trowel. Lift a section occasionally to inspect coverage. Keep seams aligned and remove trapped debris. Photograph the substrate before installation. This small record can clarify responsibility when problems appear later. When conditions are uncertain, have a qualified tile professional test the surface first.

Resources

Copyright © CUSTOM Building Products 2025
Products | Resources | Interactive Tools | Warranties | Privacy Policy | Terms of Use | Technical Training