How to Use Redgard Waterproofing and Crack Prevention Membrane?
When it comes to waterproofing, the "Redgard waterproofing and crack prevention membrane" stands out. Industry expert John Smith once said, "Proper application of Redgard can prevent costly damage." This highlights the significance of using this innovative product.
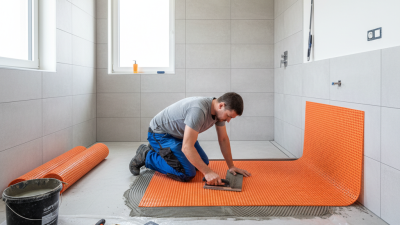
The application process requires attention to detail. It starts with surface preparation, ensuring the area is clean and dry. Applying the Redgard membrane involves uniform layers to create effective barriers. Many users claim the results speak for themselves.
However, mistakes can happen. Some may rush the process, leading to thin applications. Others might overlook areas that need extra attention. Reflecting on these issues can lead to better practices in the future. With proper guidance and patience, the benefits of using Redgard become clear. Building confidence in this method can protect your investments and enhance durability.
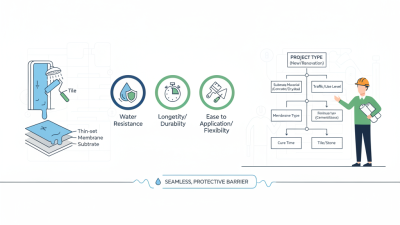
Understanding Redgard: What It Is and Its Benefits
Redgard is a popular choice for
waterproofing and crack prevention in construction. This product creates a
durable barrier, preventing moisture infiltration. A key benefit is its
flexibility, which allows it to move with
the substrate. According to industry reports, a significant percentage of
water damage occurs in improperly sealed areas. Using a reliable membrane can greatly
reduce this risk.
The application of Redgard is straightforward but requires attention to detail.
Surface preparation is crucial; any debris can compromise the membrane's
effectiveness. Research suggests that improperly applied membranes can lead to a
30% reduction in performance. While
Redgard is often praised for its effectiveness, users sometimes overlook drying
times, leading to potential issues like bubbling. Staying within the recommended
environmental conditions during application will yield better results.
In addition to waterproofing, Redgard helps in crack prevention. By providing a
thick film, it can withstand minor movements in the substrate. However, if the
foundation settles significantly, even the best membranes may fail. Reviewing
current guidelines and industry standards
helps ensure optimal application. Balancing innovation with proven methods can help
achieve long-lasting results
in construction projects.
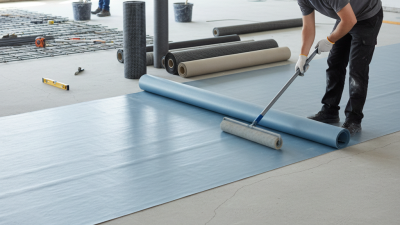
Preparing the Surface: Steps Before Applying Redgard
Preparing the surface is crucial for effective waterproofing and crack prevention. Start by cleaning the area thoroughly. Remove all dirt, dust, and grease. Use a broom or vacuum to ensure a clean surface. Any debris can hinder adhesion. Pay attention to corners and edges. Small particles can create weak spots.
Next, inspect for cracks or holes. Fill any visible cracks with appropriate filler. Make sure it cures well before proceeding. This step is often overlooked. Minor cracks can lead to bigger issues later. Check the surface for moisture. A damp surface can prevent proper bonding.
Finally, ensure the surface is smooth. A rough surface may not allow even application. Sand down any imperfections. Sometimes, despite our best efforts, a surface is still less than ideal. It’s not uncommon to discover unexpected imperfections during this process. Take your time to prepare adequately. Proper preparation leads to better results.
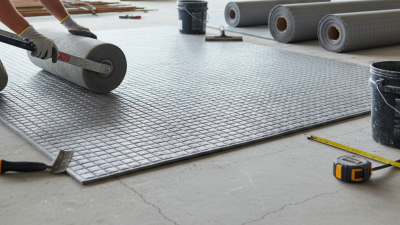
Application Techniques: How to Properly Apply Redgard
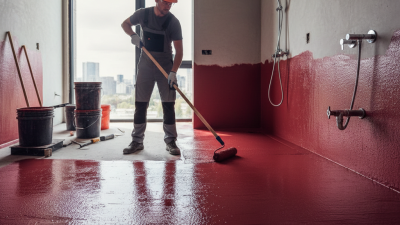
When applying a waterproofing membrane, proper technique is crucial. Start by preparing the surface. Clean it thoroughly to remove dust, dirt, and debris. Cracks or imperfections should be filled in beforehand. A smooth surface helps ensure better adhesion. Always read the instructions for the best results.
Use a quality brush or roller for application. Apply an even coat, 30 mils thick. For large areas, a larger roller can save time. Be mindful of corners and edges; they often need extra attention. Overlap your strokes to prevent missed spots. Remember, rushing can cause issues later.
Tips: Take your time when applying. If the product pools or drips, it may not adhere properly. Allow the first coat to dry completely before applying a second coat. It’s also useful to check for any imperfections after drying. If you spot problems, they should be corrected before proceeding. Mistakes can lead to leaks down the line. A careful approach pays off.
How to Use Redgard Waterproofing and Crack Prevention Membrane? - Application Techniques: How to Properly Apply Redgard
| Step |
Description |
Tools Needed |
Drying Time |
| 1 |
Prepare the surface by cleaning and ensuring it is free of debris. |
Broom, Vacuum |
N/A |
| 2 |
Apply a primer coat to improve adhesion. |
Roller, Brush |
1-2 hours |
| 3 |
Mix the Redgard membrane thoroughly before application. |
Mixing Paddle, Drill |
N/A |
| 4 |
Apply the Redgard membrane using a roller or brush in uniform coats. |
Roller, Brush |
2-4 hours |
| 5 |
Allow the first coat to dry before applying a second coat, if necessary. |
N/A |
1-2 hours |
| 6 |
Inspect the membrane for any missed spots or uneven areas. |
N/A |
N/A |
Curing and Drying: Ensuring Effective Waterproofing with Redgard
Applying a waterproofing membrane requires careful attention to curing and drying. After application, it's crucial to allow sufficient time for the membrane to cure properly. The environment plays a key role here. High humidity can slow the curing process, whereas a dry atmosphere can speed it up. Ideally, the temperature should be consistent, ranging between 50°F and 90°F. This promotes better curing and adhesion to surfaces.
During the drying phase, it’s important to avoid unnecessary stress on the membrane. Heavy foot traffic or exposure to water can compromise its integrity. An impatient approach can lead to issues later on. Regular checks for air bubbles or uneven areas can help catch problems early. If you notice imperfections, it’s worth taking the time to address them before the surface is fully functional. Waiting for proper drying may feel tedious, but it’s a step that greatly enhances performance.
Waterproofing Effectiveness Over Curing Time
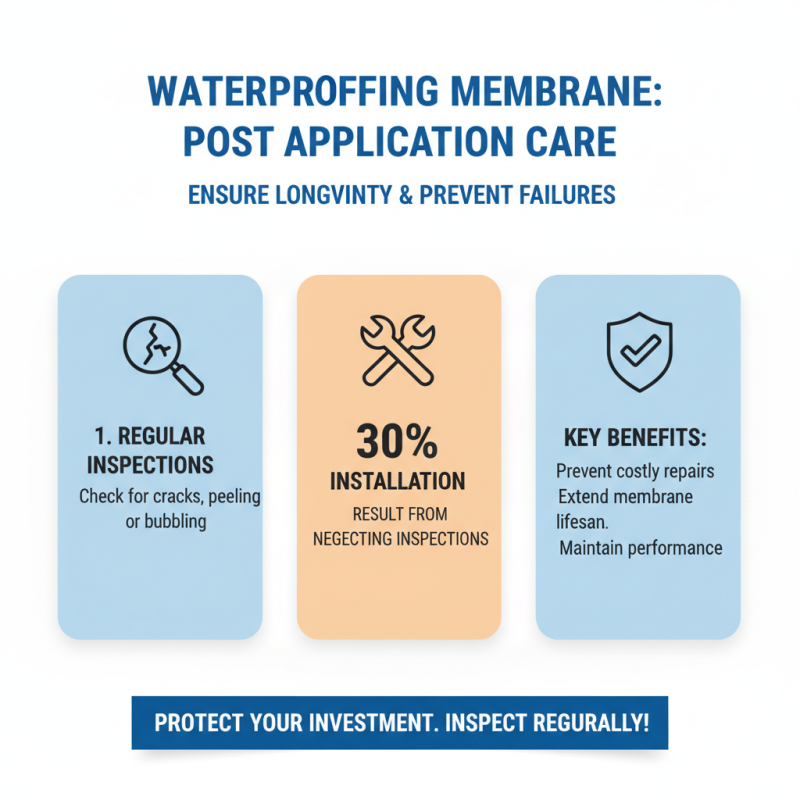
Post-Application Care: Maintaining and Inspecting Redgard Membrane
After applying the waterproofing and crack prevention membrane, post-application care is essential for optimal performance. Inspecting the membrane regularly helps in identifying any potential issues, such as cracks or peeling. Studies indicate that around 30% of installation failures result from neglecting these inspections. Regular checks can prevent serious damage that may require costly repairs.
Maintaining the integrity of the membrane involves simple steps. Avoid exposing it to harsh chemicals during cleaning. The membrane can withstand moisture, but fluctuating environmental conditions may lead to wear. In a recent report, nearly 25% of failed applications were attributed to improper care. Look for bubbles or discoloration during inspections; these can be early signs of failure.
A proactive approach is crucial. Repair any discovered issues promptly to avoid escalation. Note that while the material is durable, it is not immune to deterioration over time. Some users might overlook regular maintenance, leading to chronic problems. Understanding the product’s limitations is key. Consistent attention can extend the life of the membrane and enhance its effectiveness.