How to Install Kerdi Floor Membrane for Waterproofing Your Bathroom Floor
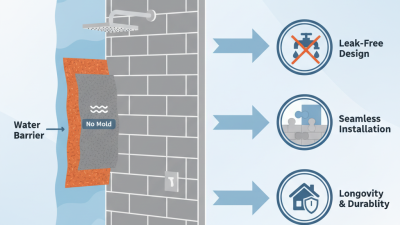
When it comes to waterproofing your bathroom floor, the Kerdi floor membrane has emerged as a game-changer in the industry. Expert contractor John Smith, known for his extensive experience in tile installation and waterproofing, emphasizes the significance of this innovative product, stating, "The Kerdi floor membrane not only eliminates the risk of water damage but also sets the stage for a beautifully tiled finished floor." This waterproofing solution is designed to create a secure barrier, preventing moisture from seeping into the subfloor, which can lead to costly repairs and mold growth.
Installing the Kerdi floor membrane may seem daunting to some, but with the right guidance and tools, it can be a straightforward process. Proper installation ensures that your bathroom remains dry and functional for years to come, as it adheres seamlessly to various substrates. In this comprehensive guide, we will delve into the step-by-step process of installing the Kerdi floor membrane, offering tips and insights to help you achieve a waterproof and durable bathroom that looks great and stands the test of time.
Understanding Kerdi Floor Membrane and Its Benefits for Bathrooms
The Kerdi floor membrane has revolutionized bathroom waterproofing by providing an effective barrier against moisture, which is crucial in preventing mold and mildew growth. According to the Centers for Disease Control and Prevention, mold can thrive in damp environments and can lead to various health issues, making efficient waterproofing a critical aspect of bathroom design. The use of a membrane like Kerdi can significantly reduce the odds of these health risks by ensuring a dry subfloor.
In addition to health benefits, the Kerdi floor membrane is lauded for its ease of installation and effectiveness. A report from the National Association of Home Builders indicates that improper waterproofing can lead to expensive renovations, with water damage accounting for an estimated
$13 billion annually in the United States. Kerdi’s user-friendly design allows even DIY enthusiasts to achieve professional-grade results, mitigating the risk of costly repairs down the line. By investing in a quality waterproofing system, homeowners can enhance their bathroom's longevity and add value to their property.
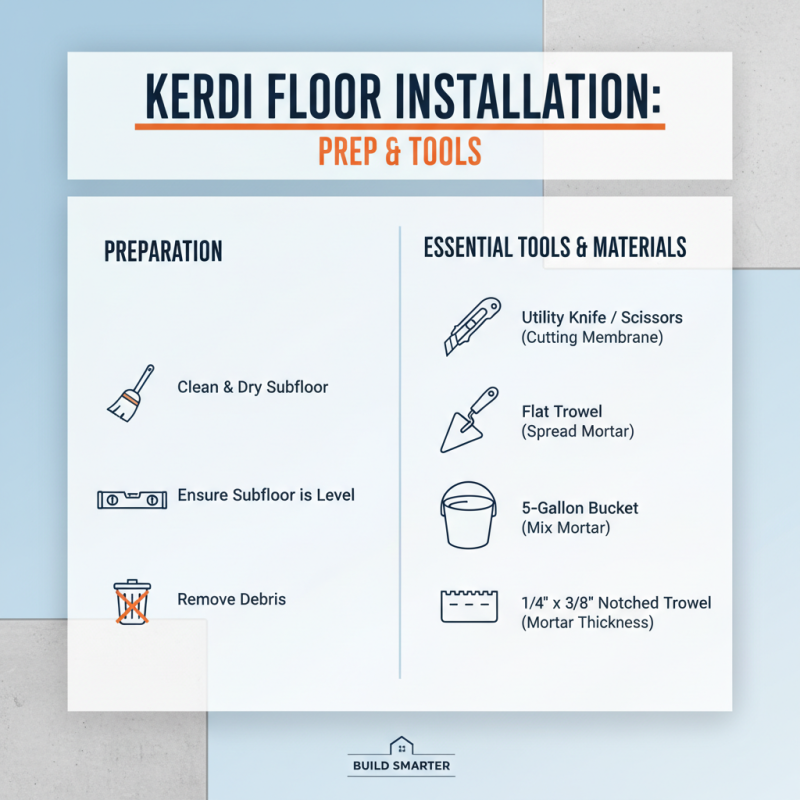
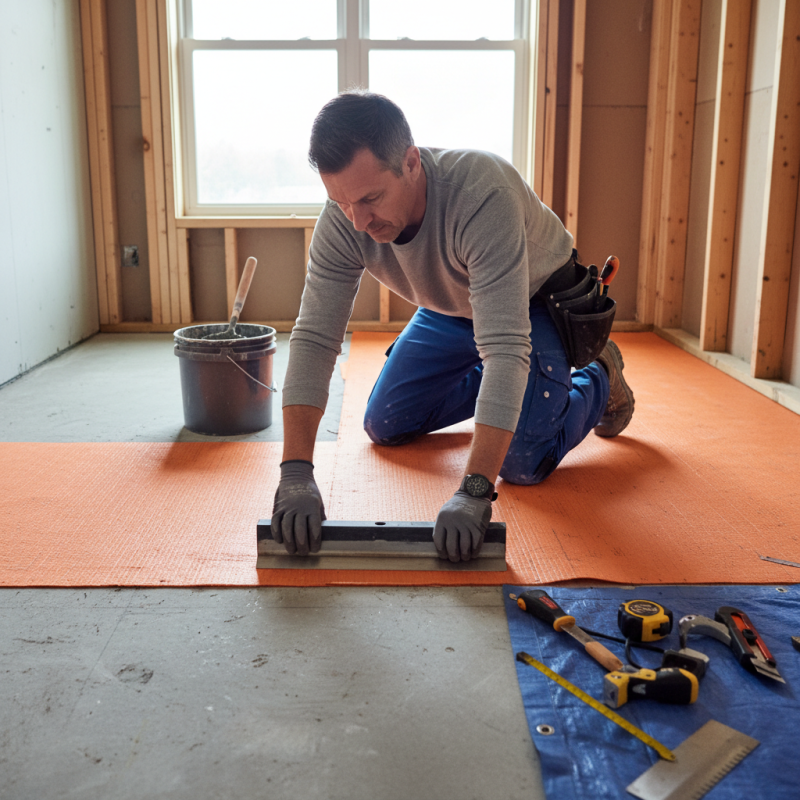
Preparing Your Bathroom Floor: Tools and Materials Needed
Before you start the installation of a Kerdi floor membrane for waterproofing your bathroom floor, it's essential to gather the right tools and materials. Begin with a clean and dry workspace, ensuring that the existing subfloor is level and free of debris. You will need a utility knife or scissors for cutting the membrane to size, a trowel for spreading the thin-set mortar, and a 5-gallon bucket for mixing the mortar. Additionally, a notch trowel, typically 1/4-inch by 3/8-inch, is crucial for achieving the correct application thickness.
In terms of materials, the primary component is the Kerdi membrane itself, along with thin-set mortar specifically designed for the job. You will also require a fleece tape to seal the seams between the membrane pieces and a waterproof sealant for edges and corners. For optimal results, consider having a measuring tape on hand to ensure accurate cuts and fit. With these tools and materials organized, you will be well-prepared to create a reliable waterproof barrier for your bathroom floor.
Step-by-Step Installation Process for Kerdi Floor Membrane
Installing a Kerdi floor membrane is an essential step in ensuring a waterproof bathroom floor. The installation process begins with preparing the substrate. Make sure the floor is clean, dry, and free from any debris. It’s important to check for any uneven areas — filling in low spots and leveling is crucial for a smooth installation.
Once the surface is prepared, you can start applying the thin-set mortar according to the manufacturer's guidelines, using a notched trowel for even coverage.
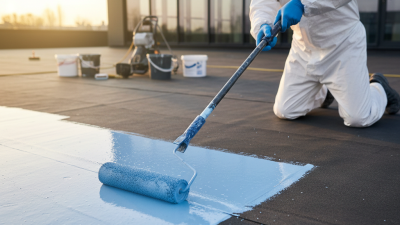
Next, lay the Kerdi membrane over the thin-set. Press it firmly into place while smoothing out any wrinkles or air bubbles. Overlap seams by at least two inches and apply more thin-set to adhere the seams securely. This step is critical as it ensures complete waterproofing. After installing the membrane, let it cure as per the instructions before proceeding to tile or lay your flooring material.
Tips: Always work in a well-ventilated area, and consider using a helper for larger projects to manage the membrane more easily. It’s also advisable to use a utility knife for precise cuts, especially around corners and plumbing fixtures for a professional finish. Don’t rush the curing process; proper adherence is key to preventing leaks down the line.
Sealing and Finishing: Ensuring a Watertight Bathroom Floor
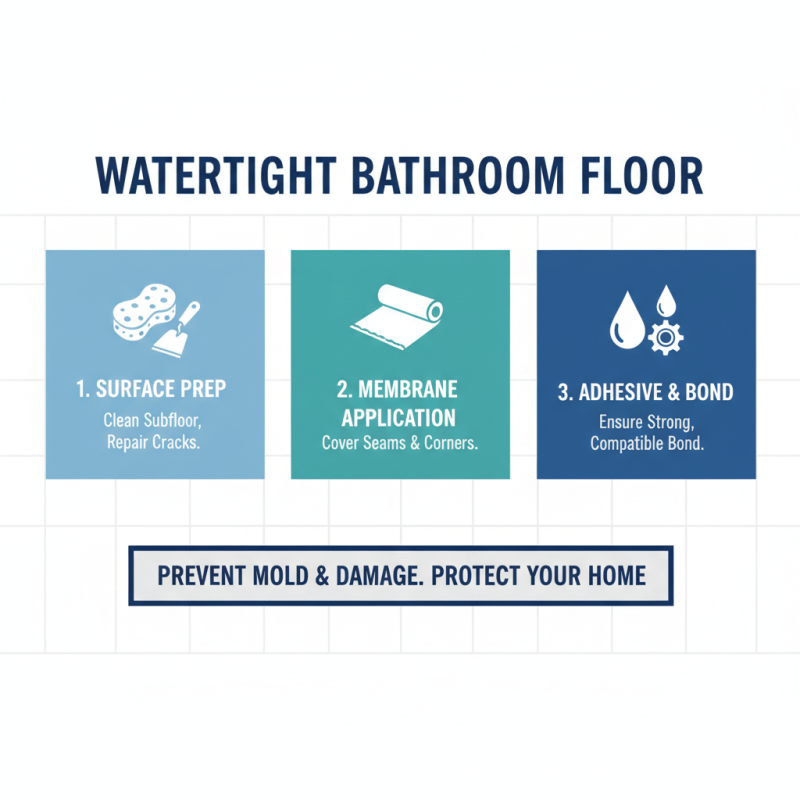
Ensuring a watertight bathroom floor is crucial for preventing moisture-related issues that can lead to mold and structural damage. The first step in sealing your floor is to thoroughly prepare the surface before installing the membrane. This includes cleaning the subfloor and repairing any cracks or imperfections, which might compromise the integrity of the waterproofing layer. Following a careful inspection, the next stage involves applying the appropriate membrane, ensuring that all seams and corners are well covered. Make sure to use a compatible adhesive that promotes a strong bond, as this plays a key role in maintaining the waterproof barrier.
Once the membrane is laid down, it’s essential to properly seal the joints and transitions. Use a high-quality sealing tape along all edges and any penetrations, such as drains or vents, which can be potential weak points. Pay special attention to the corners, as these areas are often prone to leaks. After sealing, it is advisable to conduct a water test by flooding the area with a small amount of water and observing for any leaks over a specific period. Proper finishing, including the application of tile or other flooring materials, should also ensure that water cannot penetrate further into the subfloor. With careful attention to sealing and finishing, you can achieve a reliable waterproof floor that protects your bathroom for years to come.
Maintenance Tips for Your Kerdi Membrane Installation
Maintaining your Kerdi membrane installation is essential to ensure long-lasting waterproofing and prevent costly repairs. Regular inspections should be a part of your maintenance routine. Look for any signs of damage, such as cracks or tears in the membrane, particularly in high-traffic areas or around seams and joints. If you notice any issues, address them promptly by repairing or replacing the compromised sections to maintain the integrity of the membrane.
Additionally, keep the surface clean to avoid the buildup of mold and mildew. Regularly sweeping and mopping the floor will help to remove dirt and debris that can accumulate over time. When cleaning, opt for gentle, non-abrasive cleaners that won't damage the membrane. It's also advisable to ensure that your bathroom is well-ventilated, as excess humidity can lead to moisture problems that may affect the membrane and the overall health of your bathroom. By incorporating these maintenance strategies, you can protect your investment and enjoy a waterproof bathroom floor for years to come.
Waterproofing Methods for Bathroom Floors